
TskVlo’s Agents section lets coding agents work on your git repositories. Each agent session gets its own branch, you follow what it does live, and nothing reaches your repository until you push it. Every workspace has its own private agent container — it is created, started and stopped for you.
Step 1: Add a Provider and the Deploy Key (Admin)
- Open Workspace settings → Agents
- Click Add provider and pick OpenCode Go, Mistral, OpenAI or a custom OpenAI-compatible endpoint, then enter its API key. TskVlo checks the key and reads the provider’s models; pick a default model per provider
- Copy the workspace’s SSH key and add it to your repositories as a deploy key — read-only is enough to clone, write access lets sessions push and merge
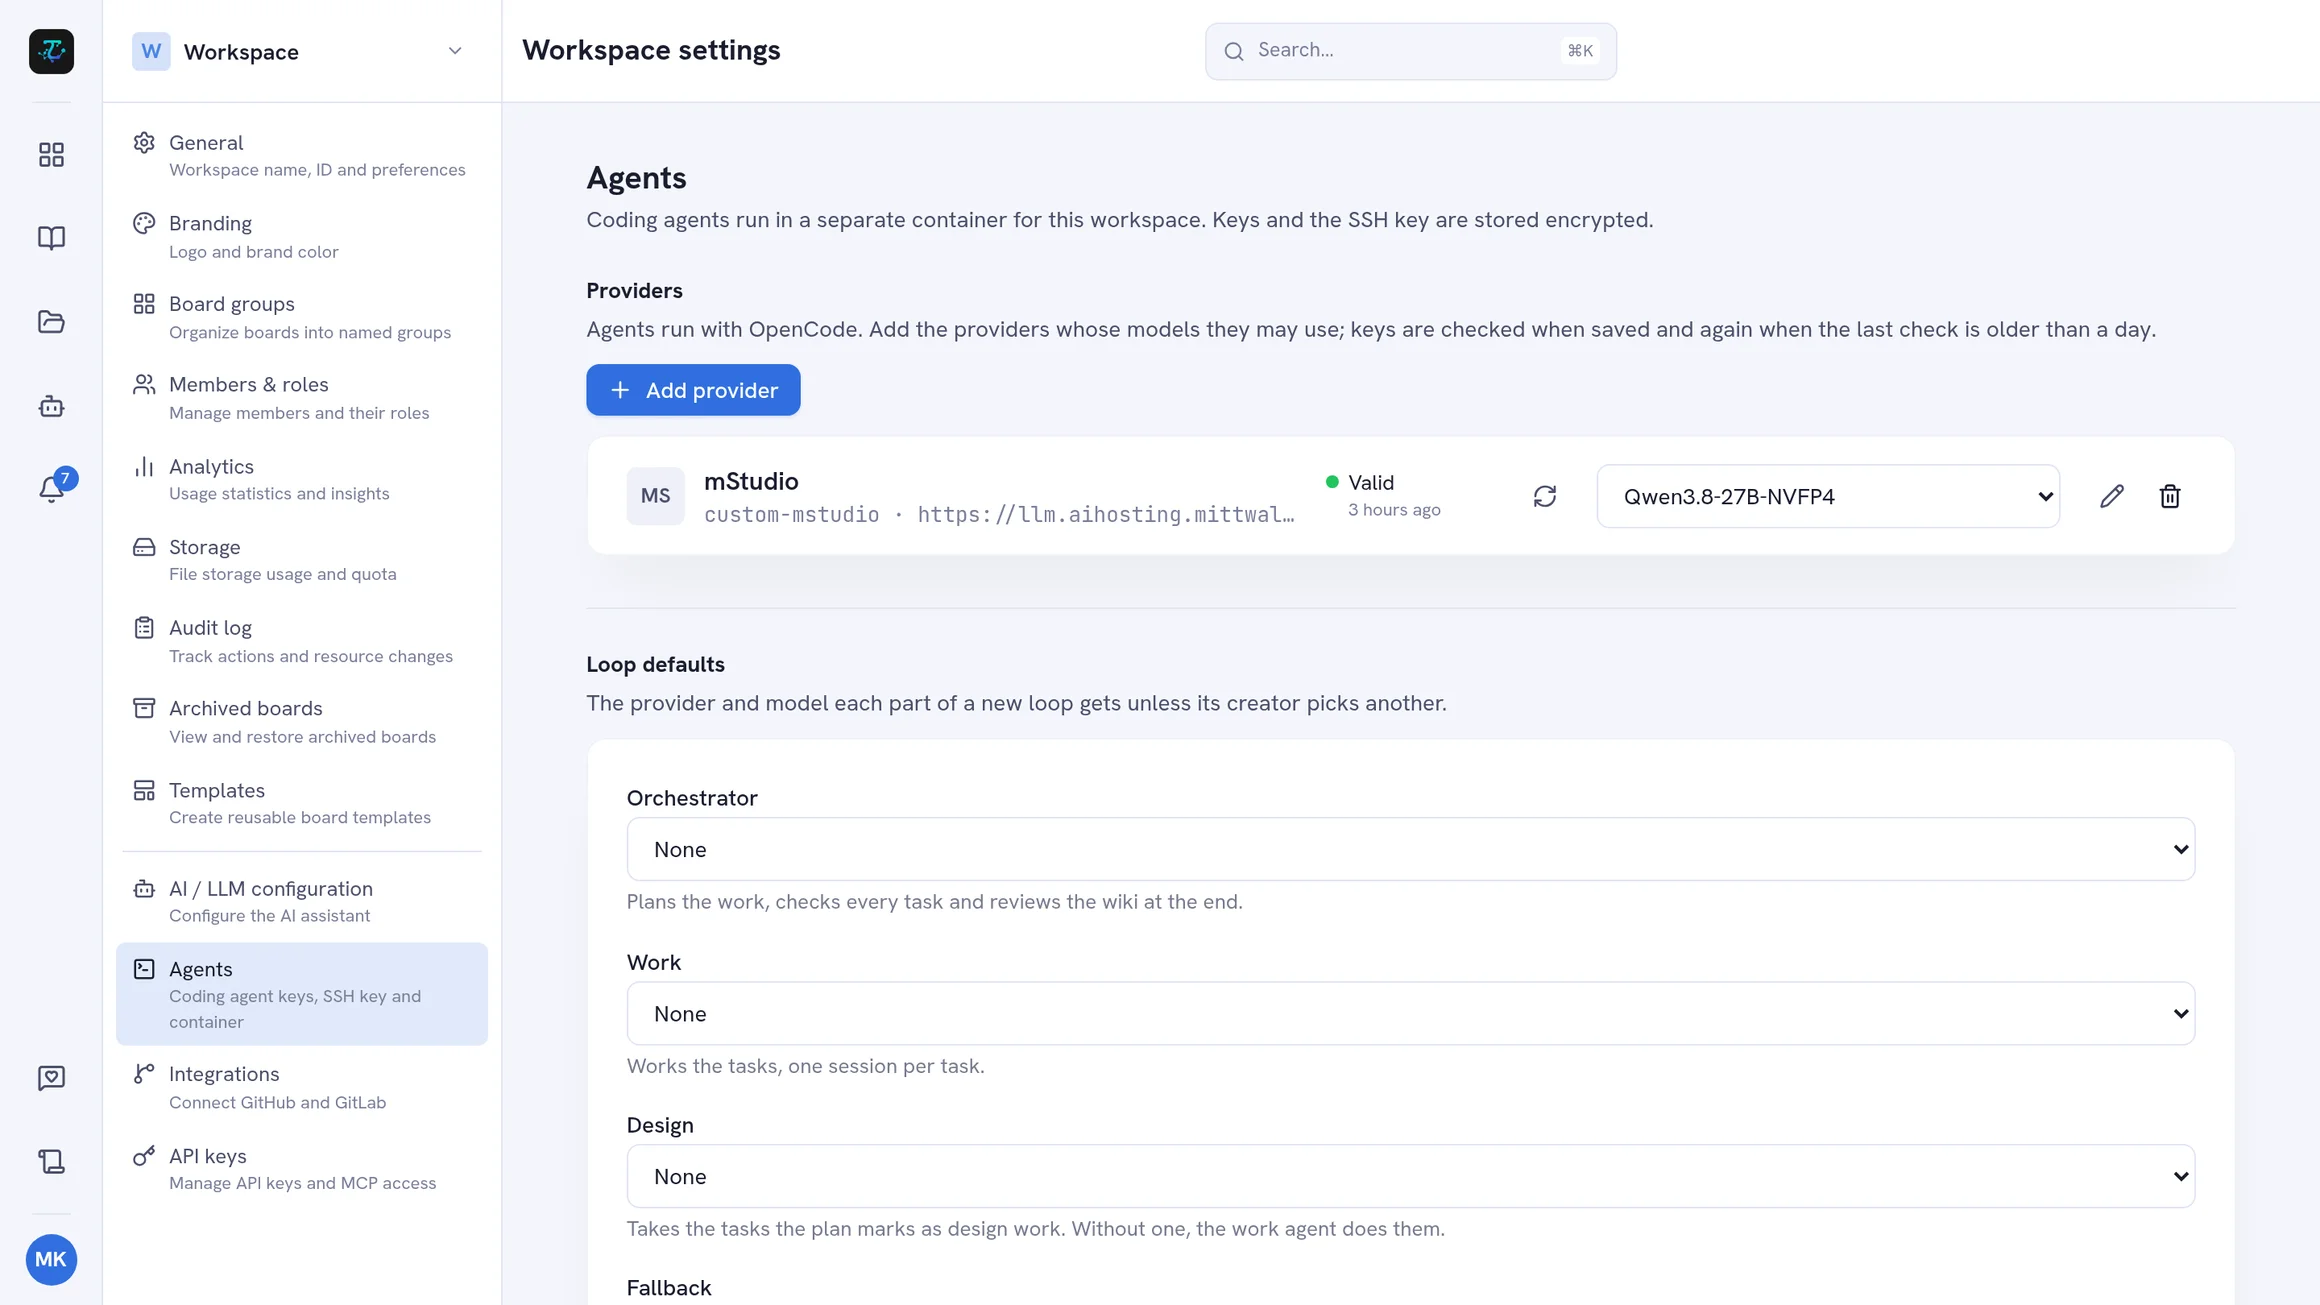
The agent container is created in the background as soon as the first provider is added.
Step 2: Create a Project
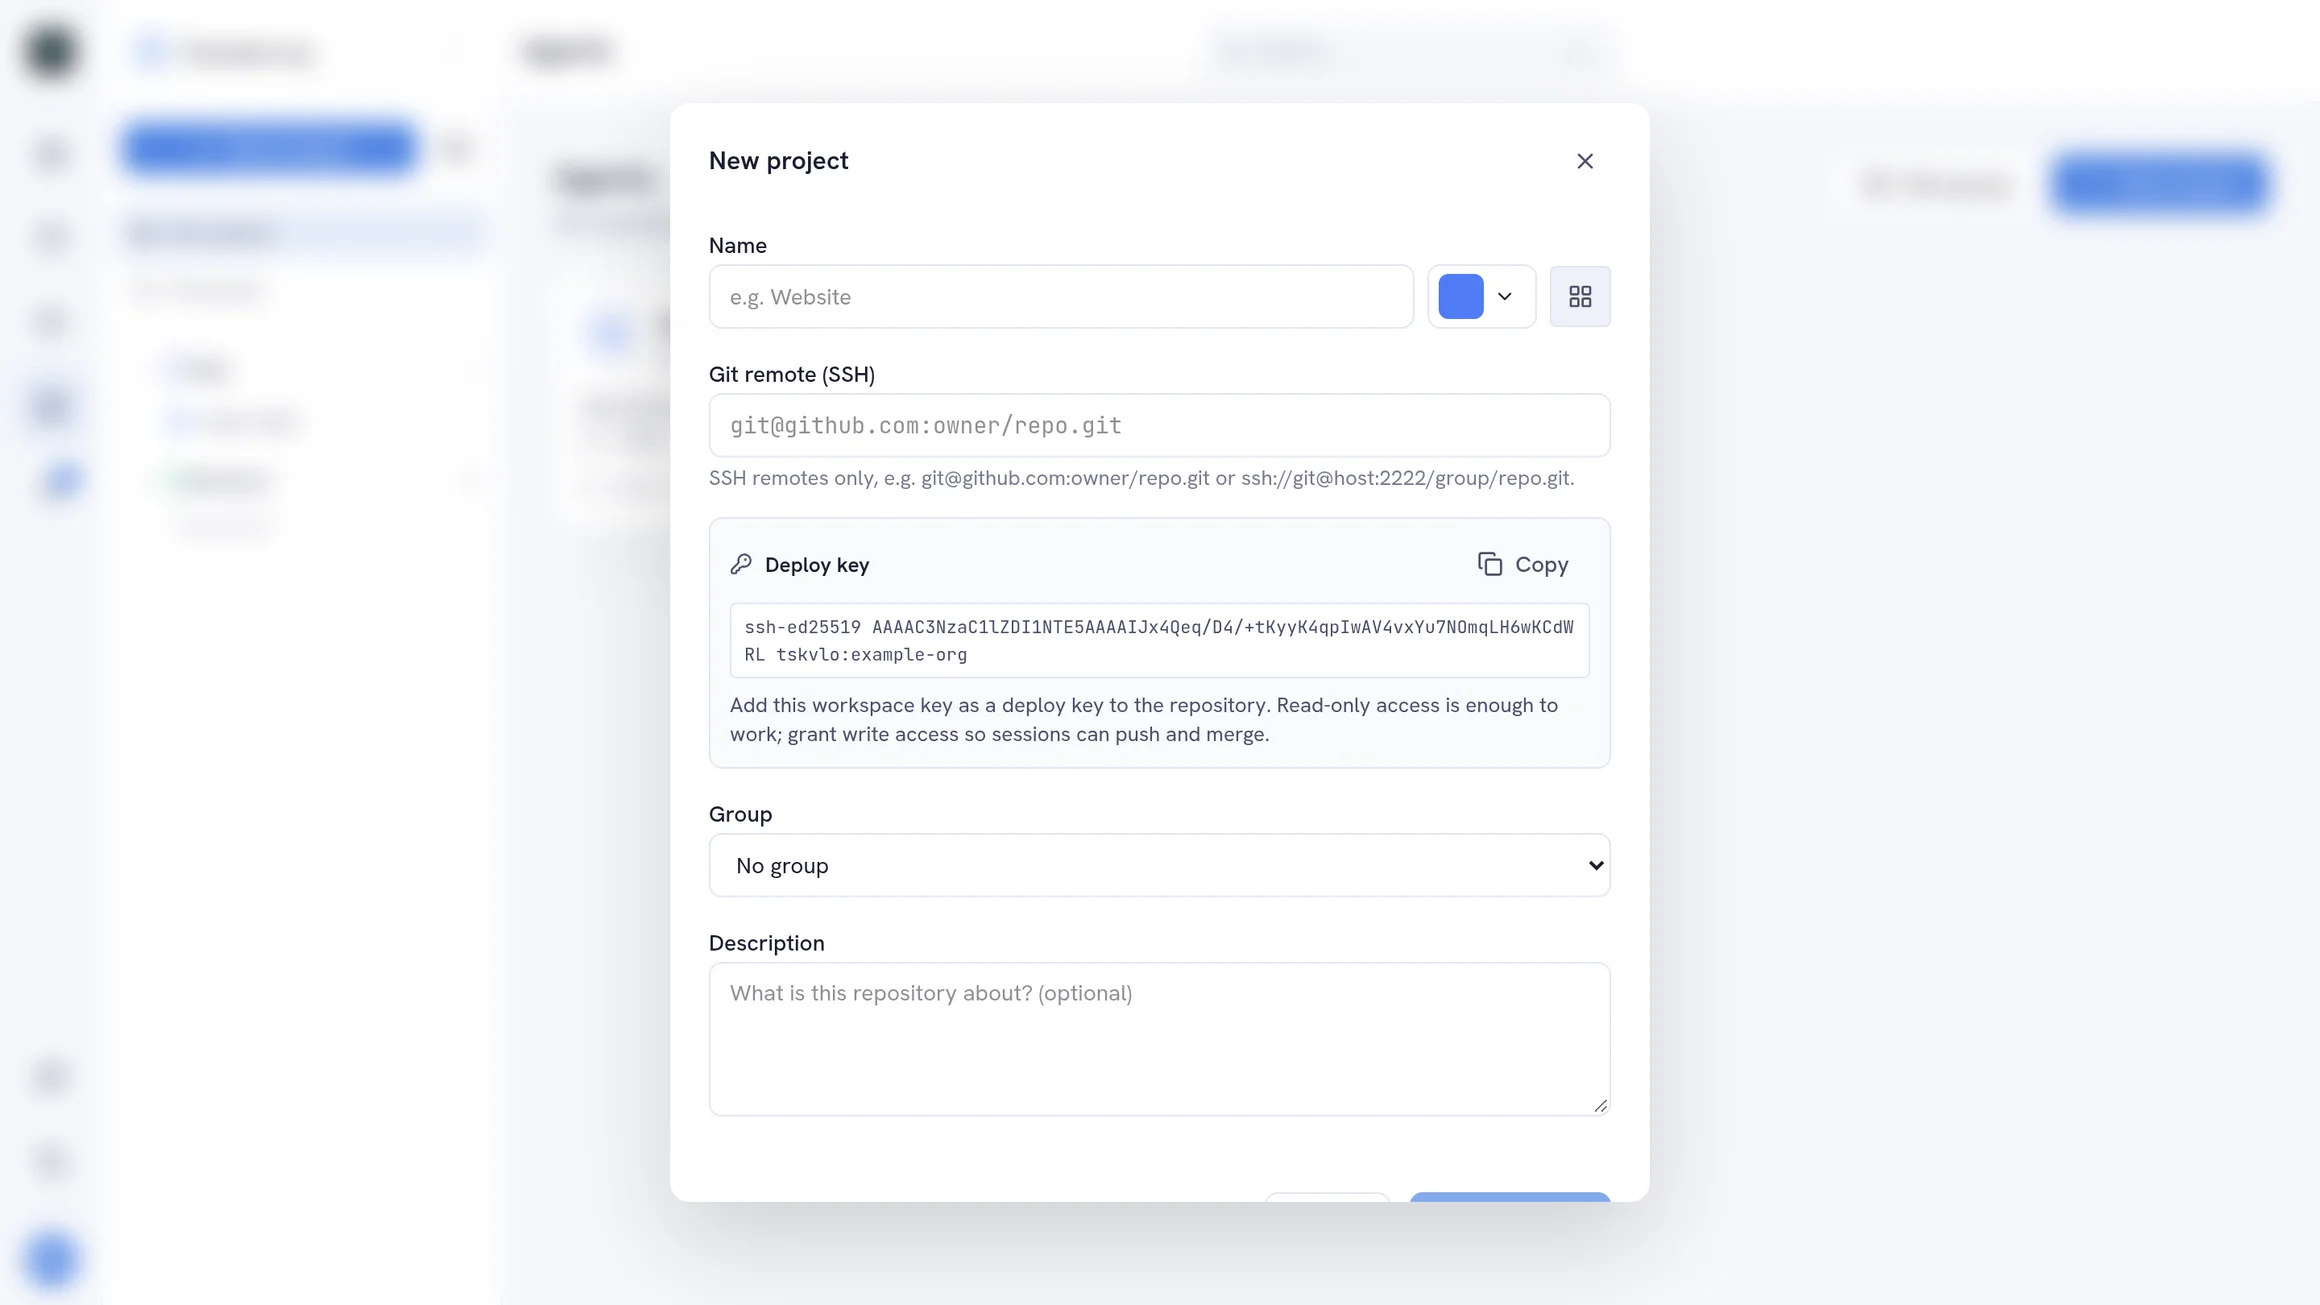
- Open Agents in the navigation rail and click New project
- Give it a name and the repository’s SSH remote (
git@host:group/repo.gitorssh://git@host:port/group/repo.git), and optionally a group, color and icon - The repository is cloned with the deploy key; the project shows Ready when it is done
Under Rules you can add standing instructions — coding conventions, how to run the tests — that every agent of the project gets.
Step 3: Write the Project Wiki
Agents read a short project wiki first: a markdown file in the repository (.tskvlo/wiki.md) that explains purpose, layout and conventions. Sessions start once it exists.
- Open the Wiki tab and click Write with an agent, or write it by hand
- Pick the size it may grow to under Size
The wiki is committed to the default branch for you.
Step 4: Start a Session
- Open the Sessions tab and click New session
- Choose the provider, model and base branch, and optionally a name
- Describe what you need in the message box and send it (Ctrl/Cmd + Enter)
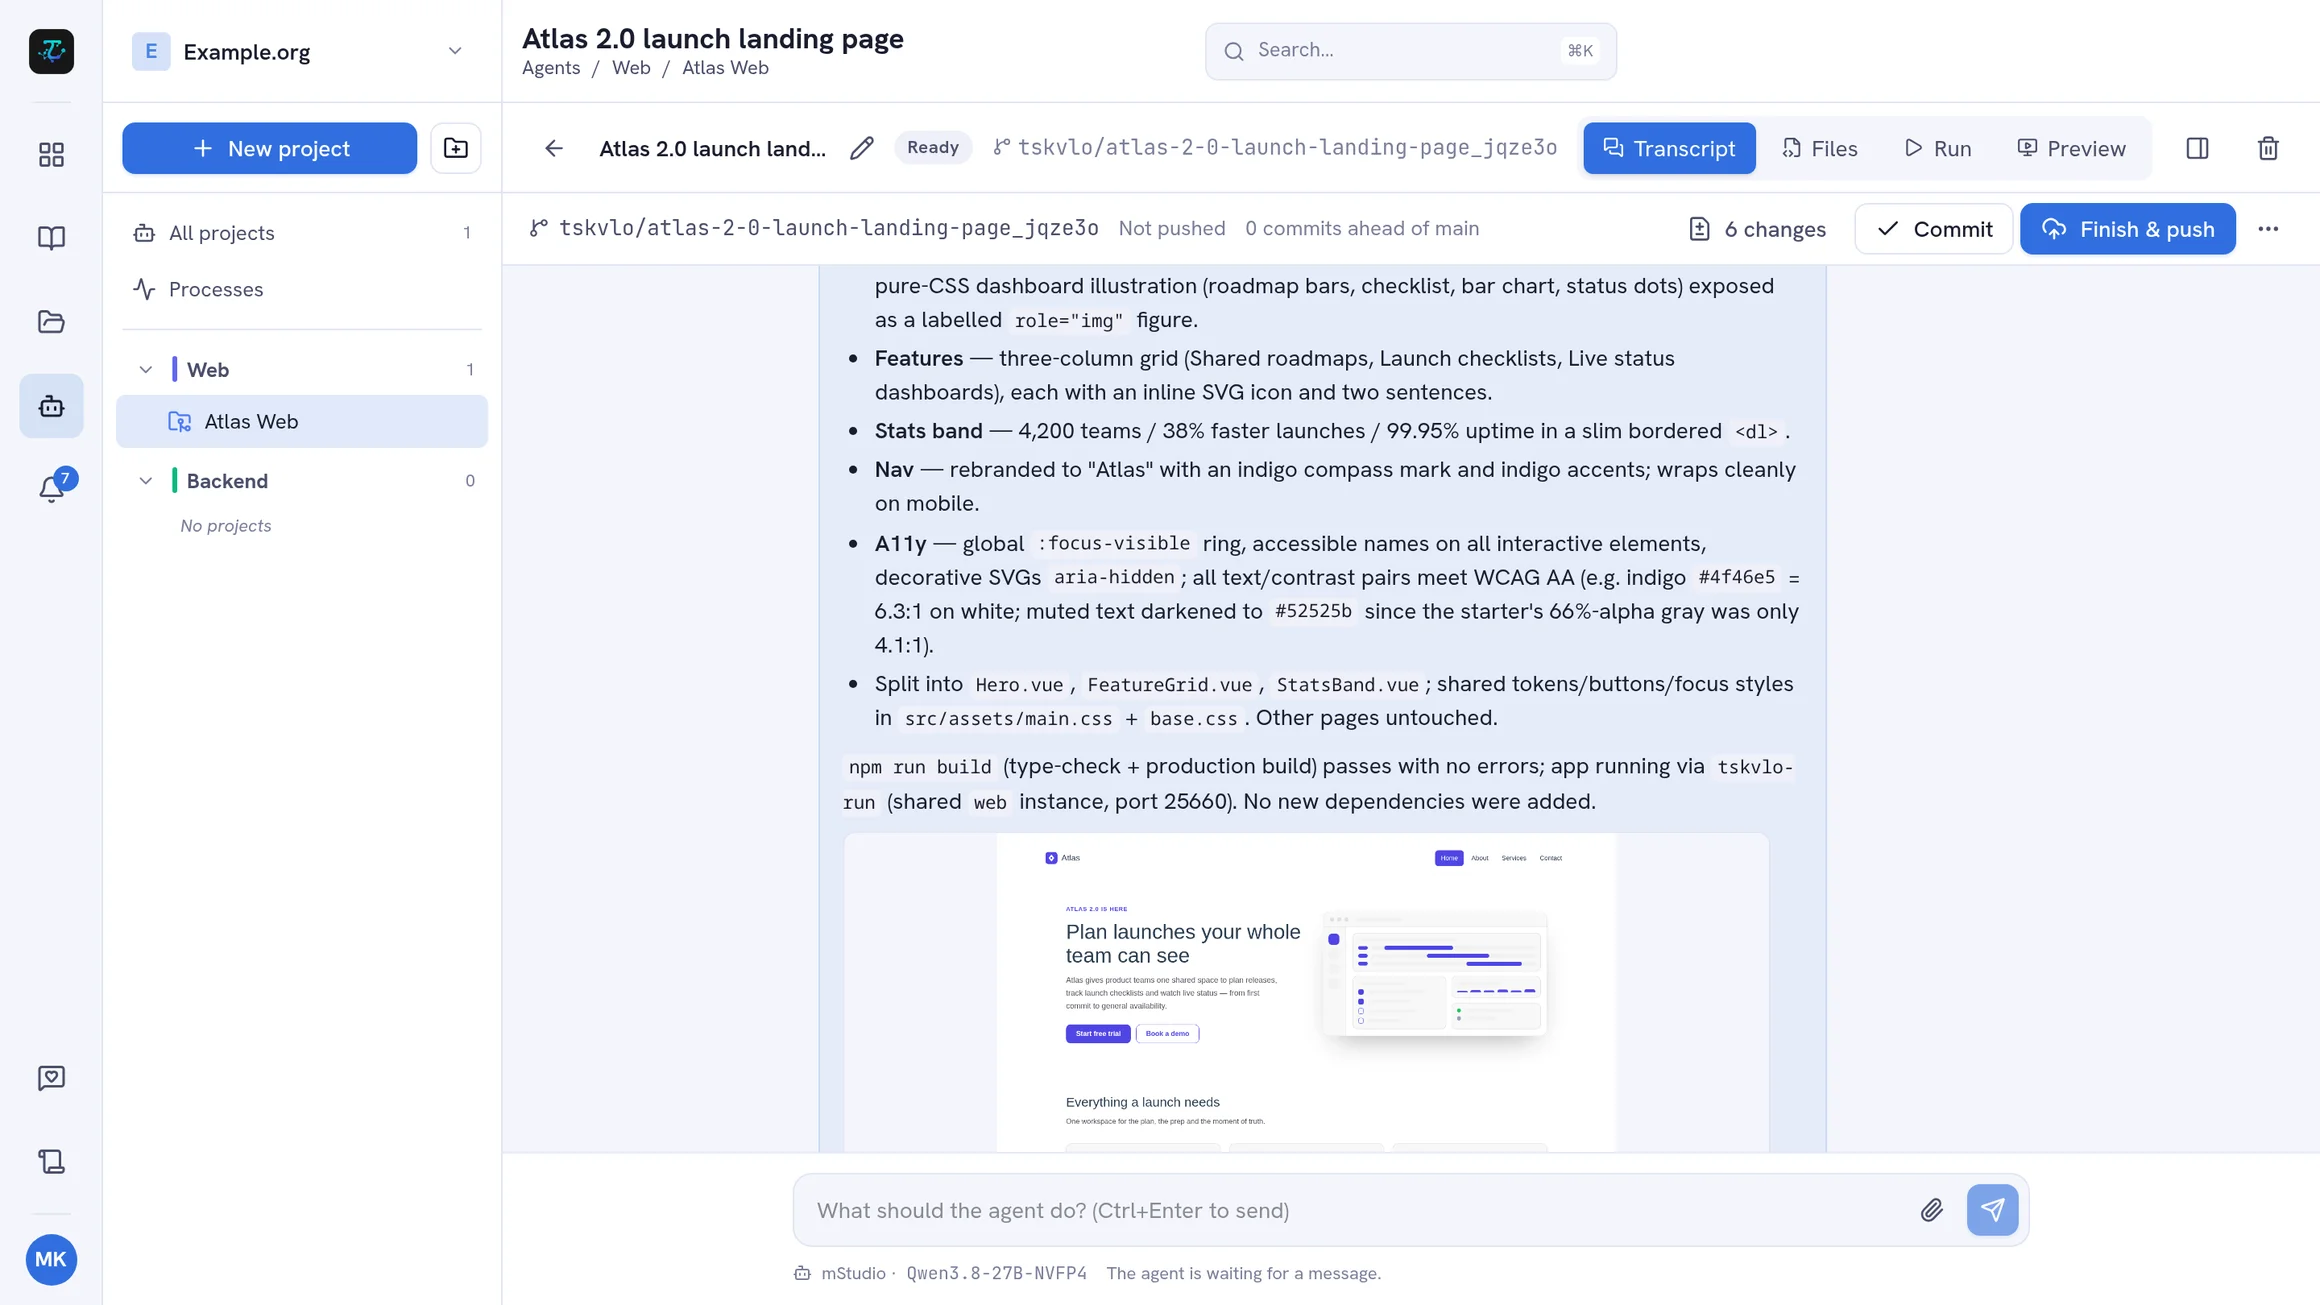
The transcript shows the agent’s messages, reasoning, tool calls with diffs, its plan and any screenshots. You can queue follow-up messages while it works, stop a turn, and attach images or zip archives. Open Files to look at — or edit — the session’s files.
Step 5: Review, Commit, Push and Merge
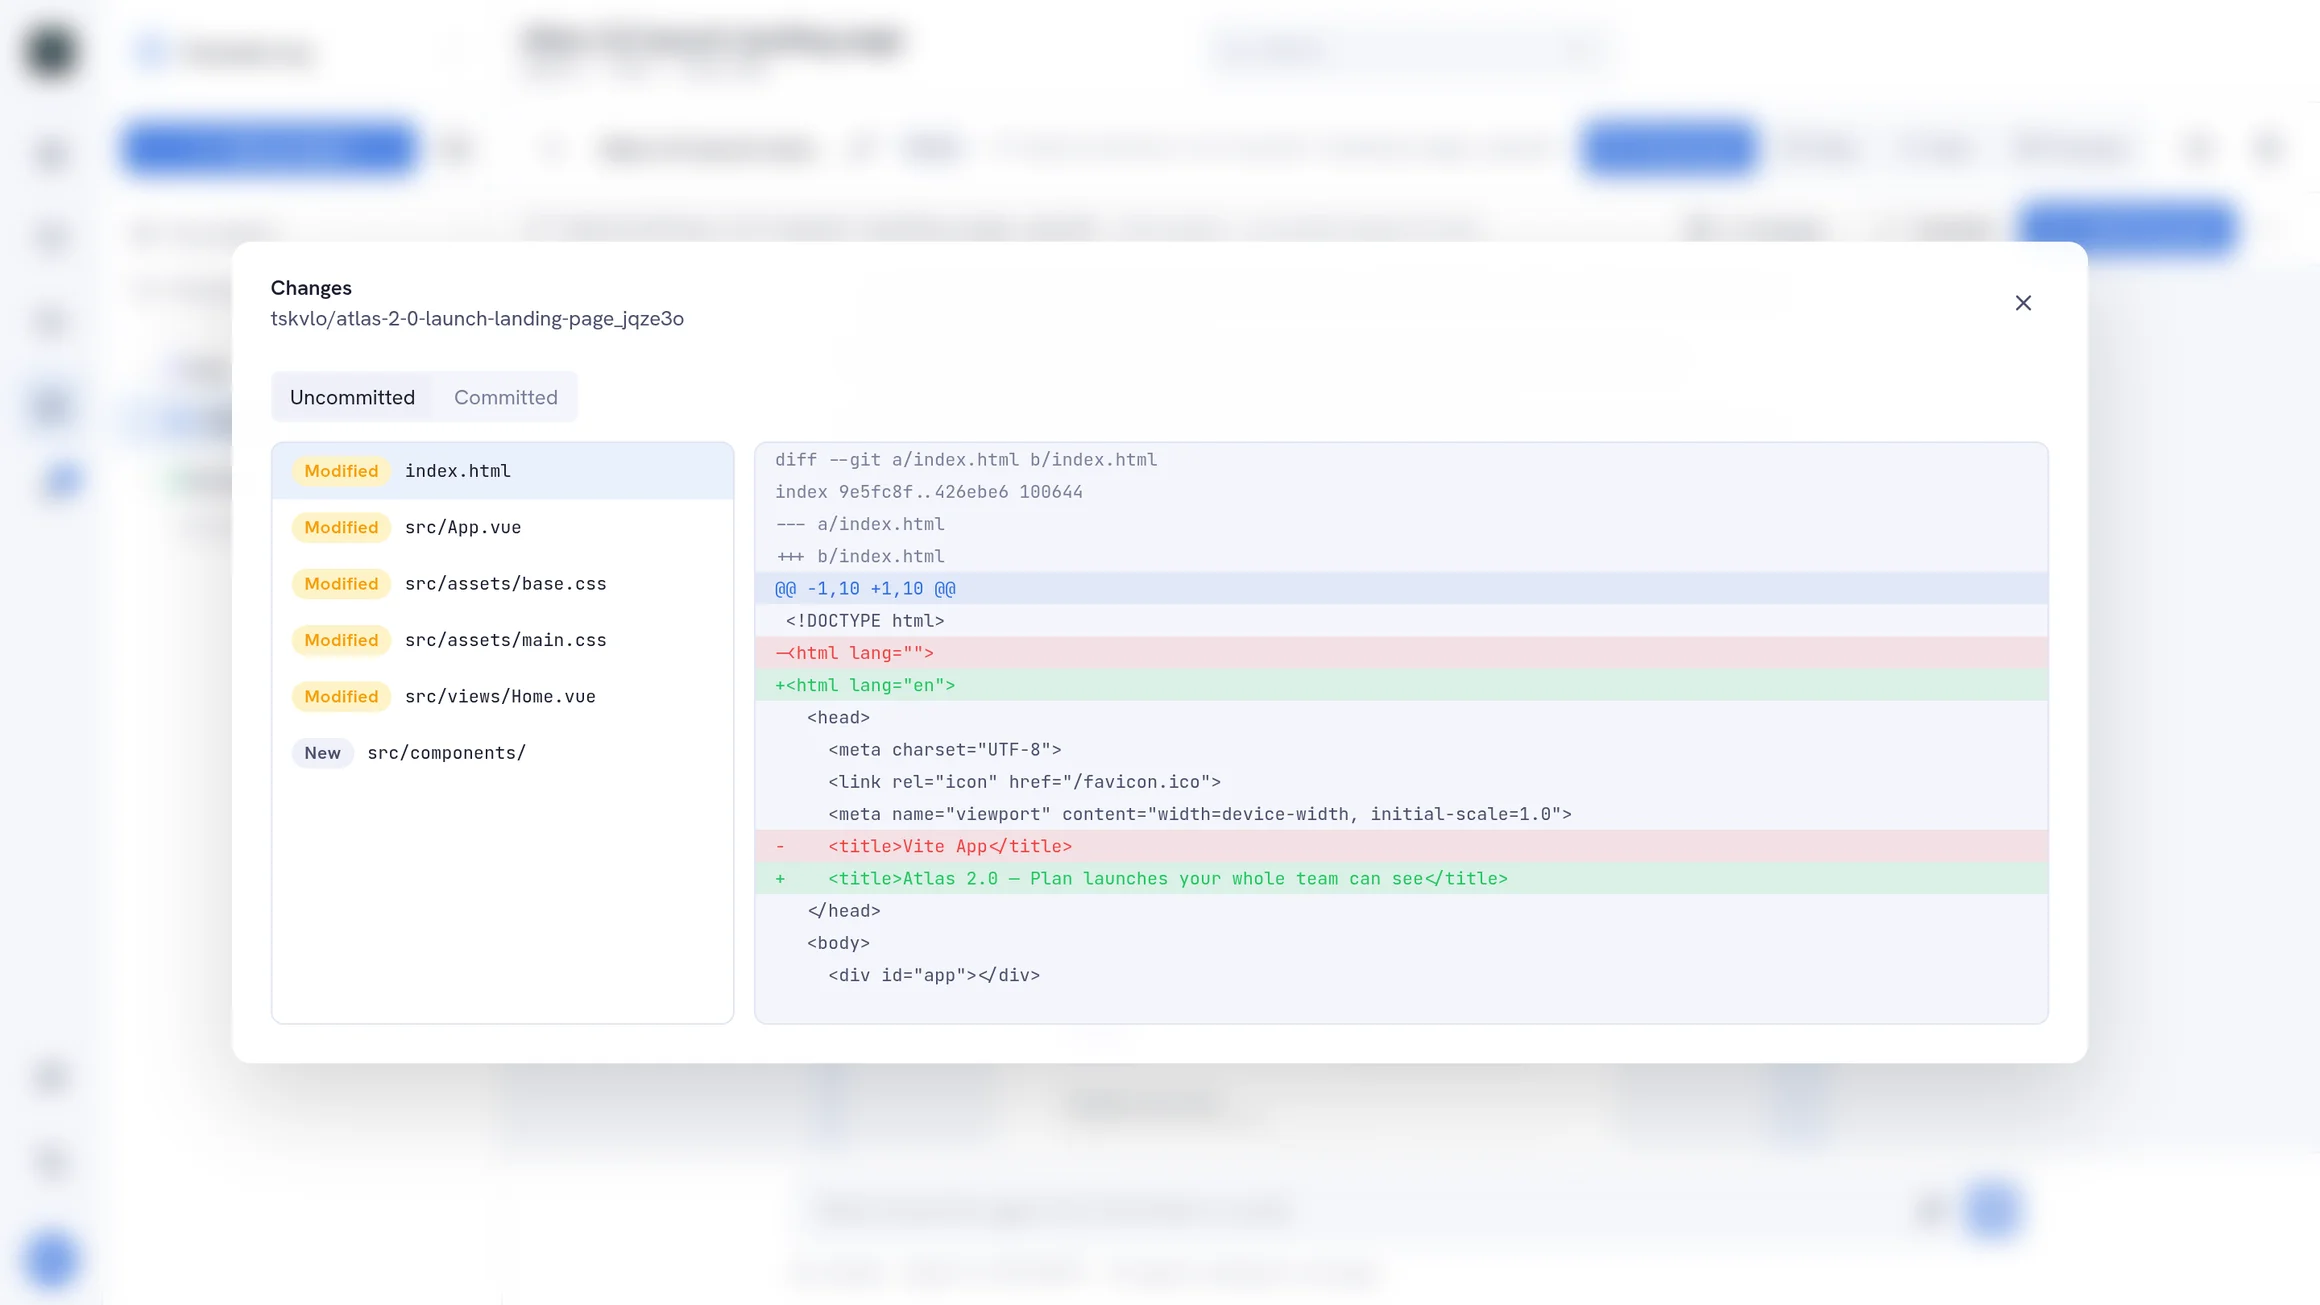
The git bar below the session header shows its branch and changes:
- Changes lists what the agent changed, with diffs
- Commit commits as you; Generate with AI writes the message for you
- Finish & push commits what is left, lets the agent update the project wiki first if you like, and pushes the branch
- Merge merges a pushed session into its base branch
The project’s Git tab shows all branches, which session owns which, and the commit graph.
Run a Loop for Bigger Changes
For work that is too big for one conversation, switch on Run as a loop when you create a session:
- The orchestrator cuts your request into tasks
- Review the plan and Approve it, or say what should change
- Fresh agents work the tasks one at a time; the orchestrator checks each against its criteria, and every passed task becomes one commit
- When all tasks passed, ask for more or finish and push — or let the loop finish and merge automatically
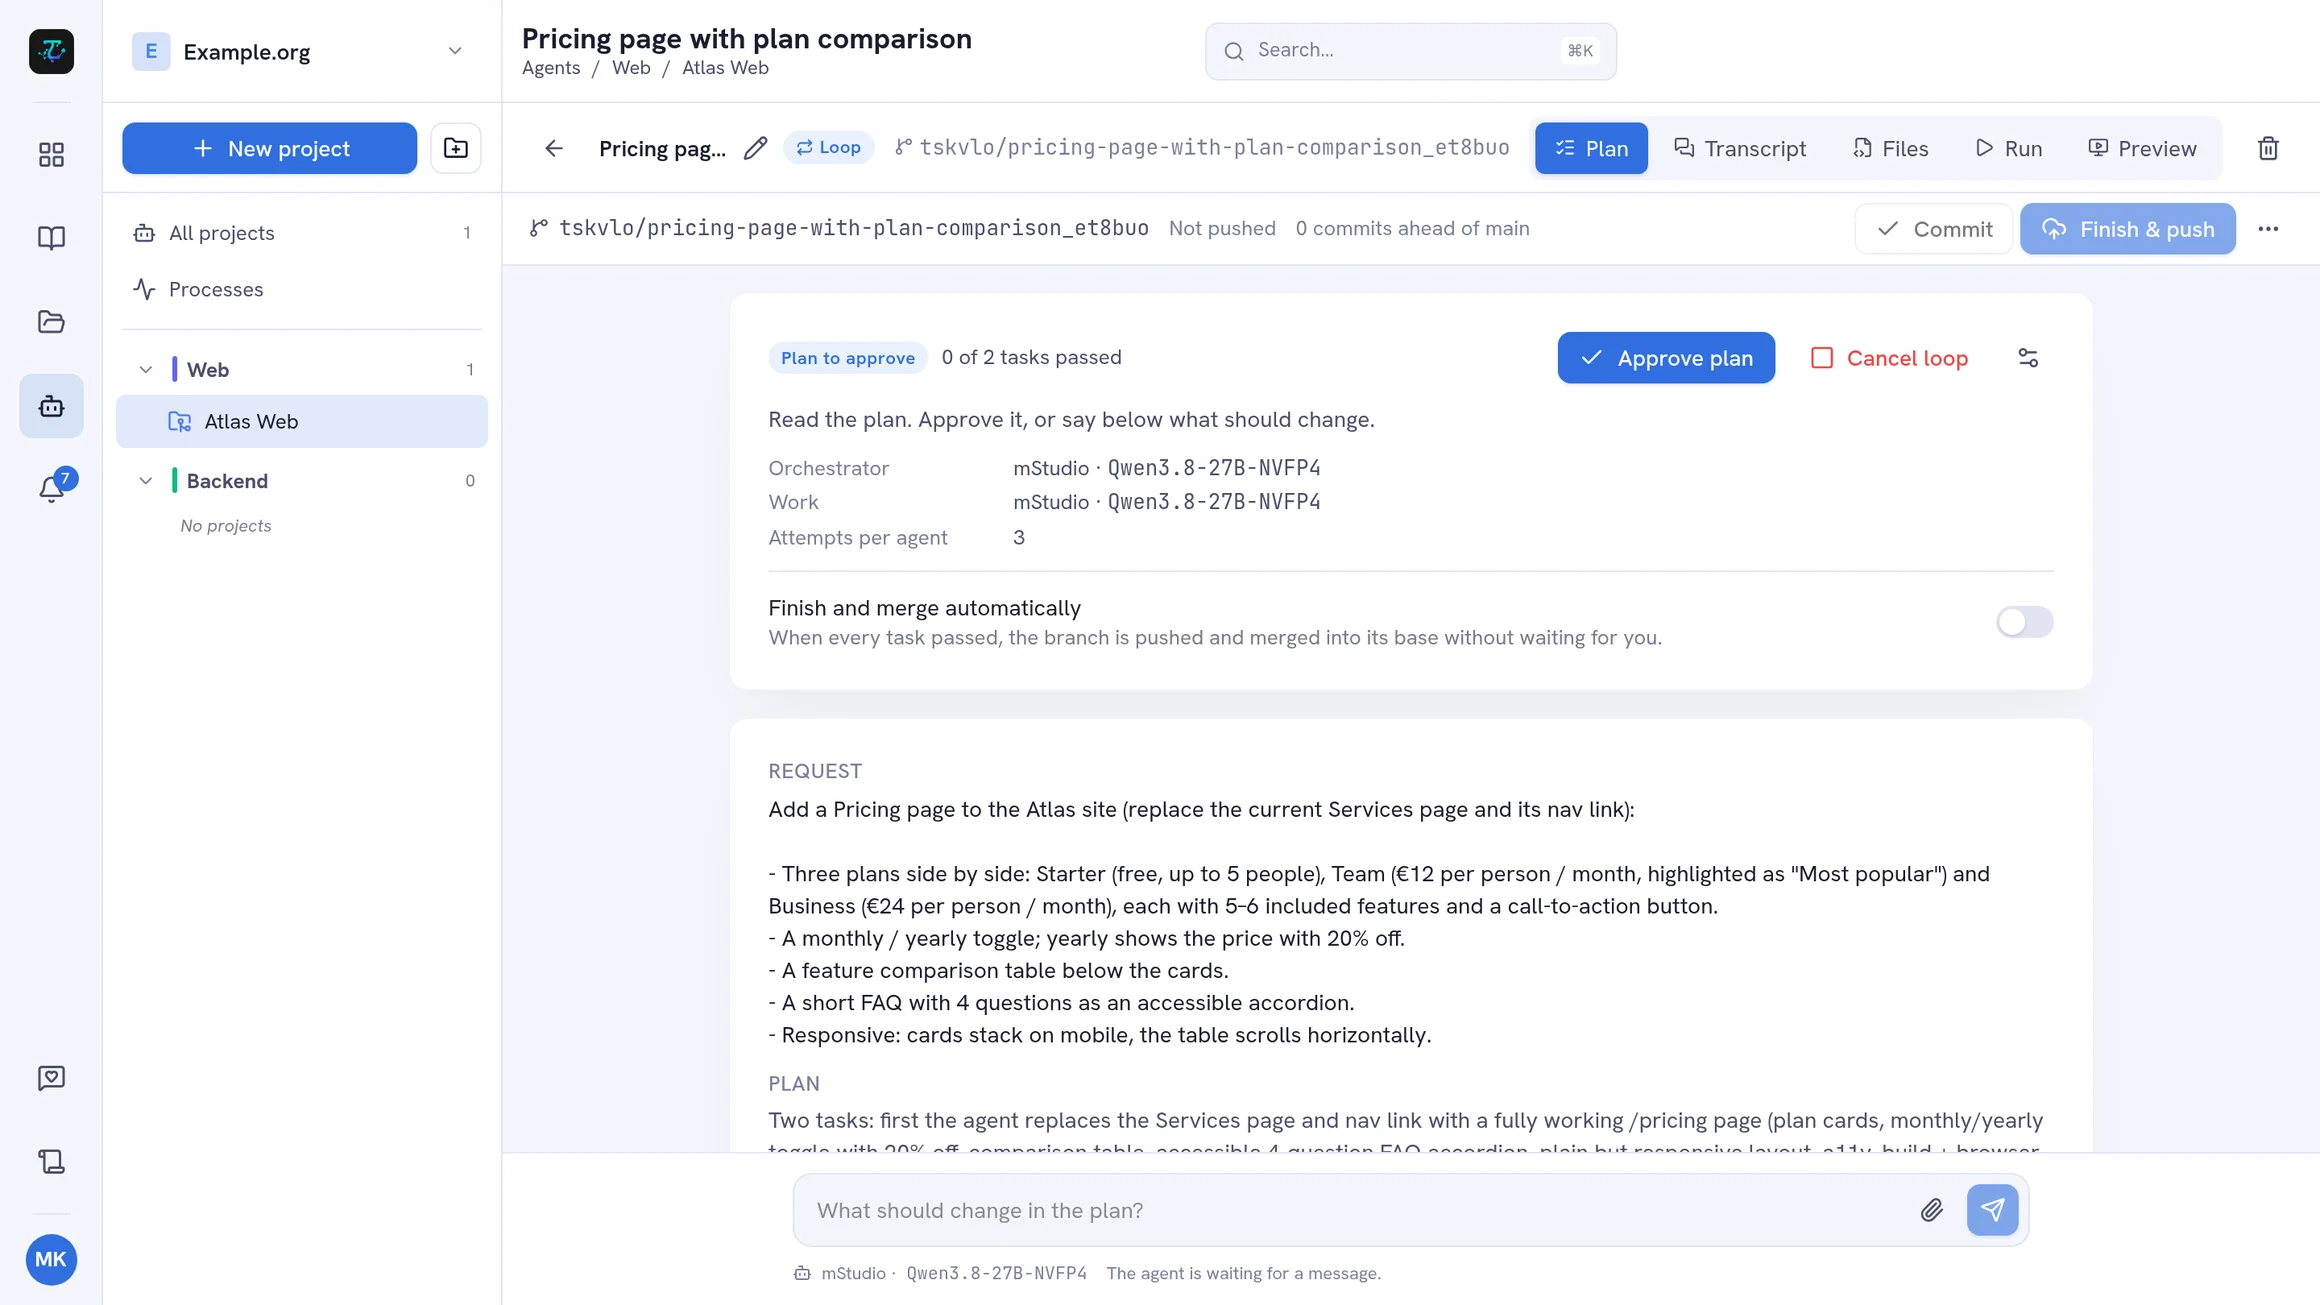
You can pause, resume, retry a blocked task, cancel, and choose separate agents for design work and as a fallback. Admins set default agents for each role under Workspace settings → Agents → Loop defaults.
Start from a Task
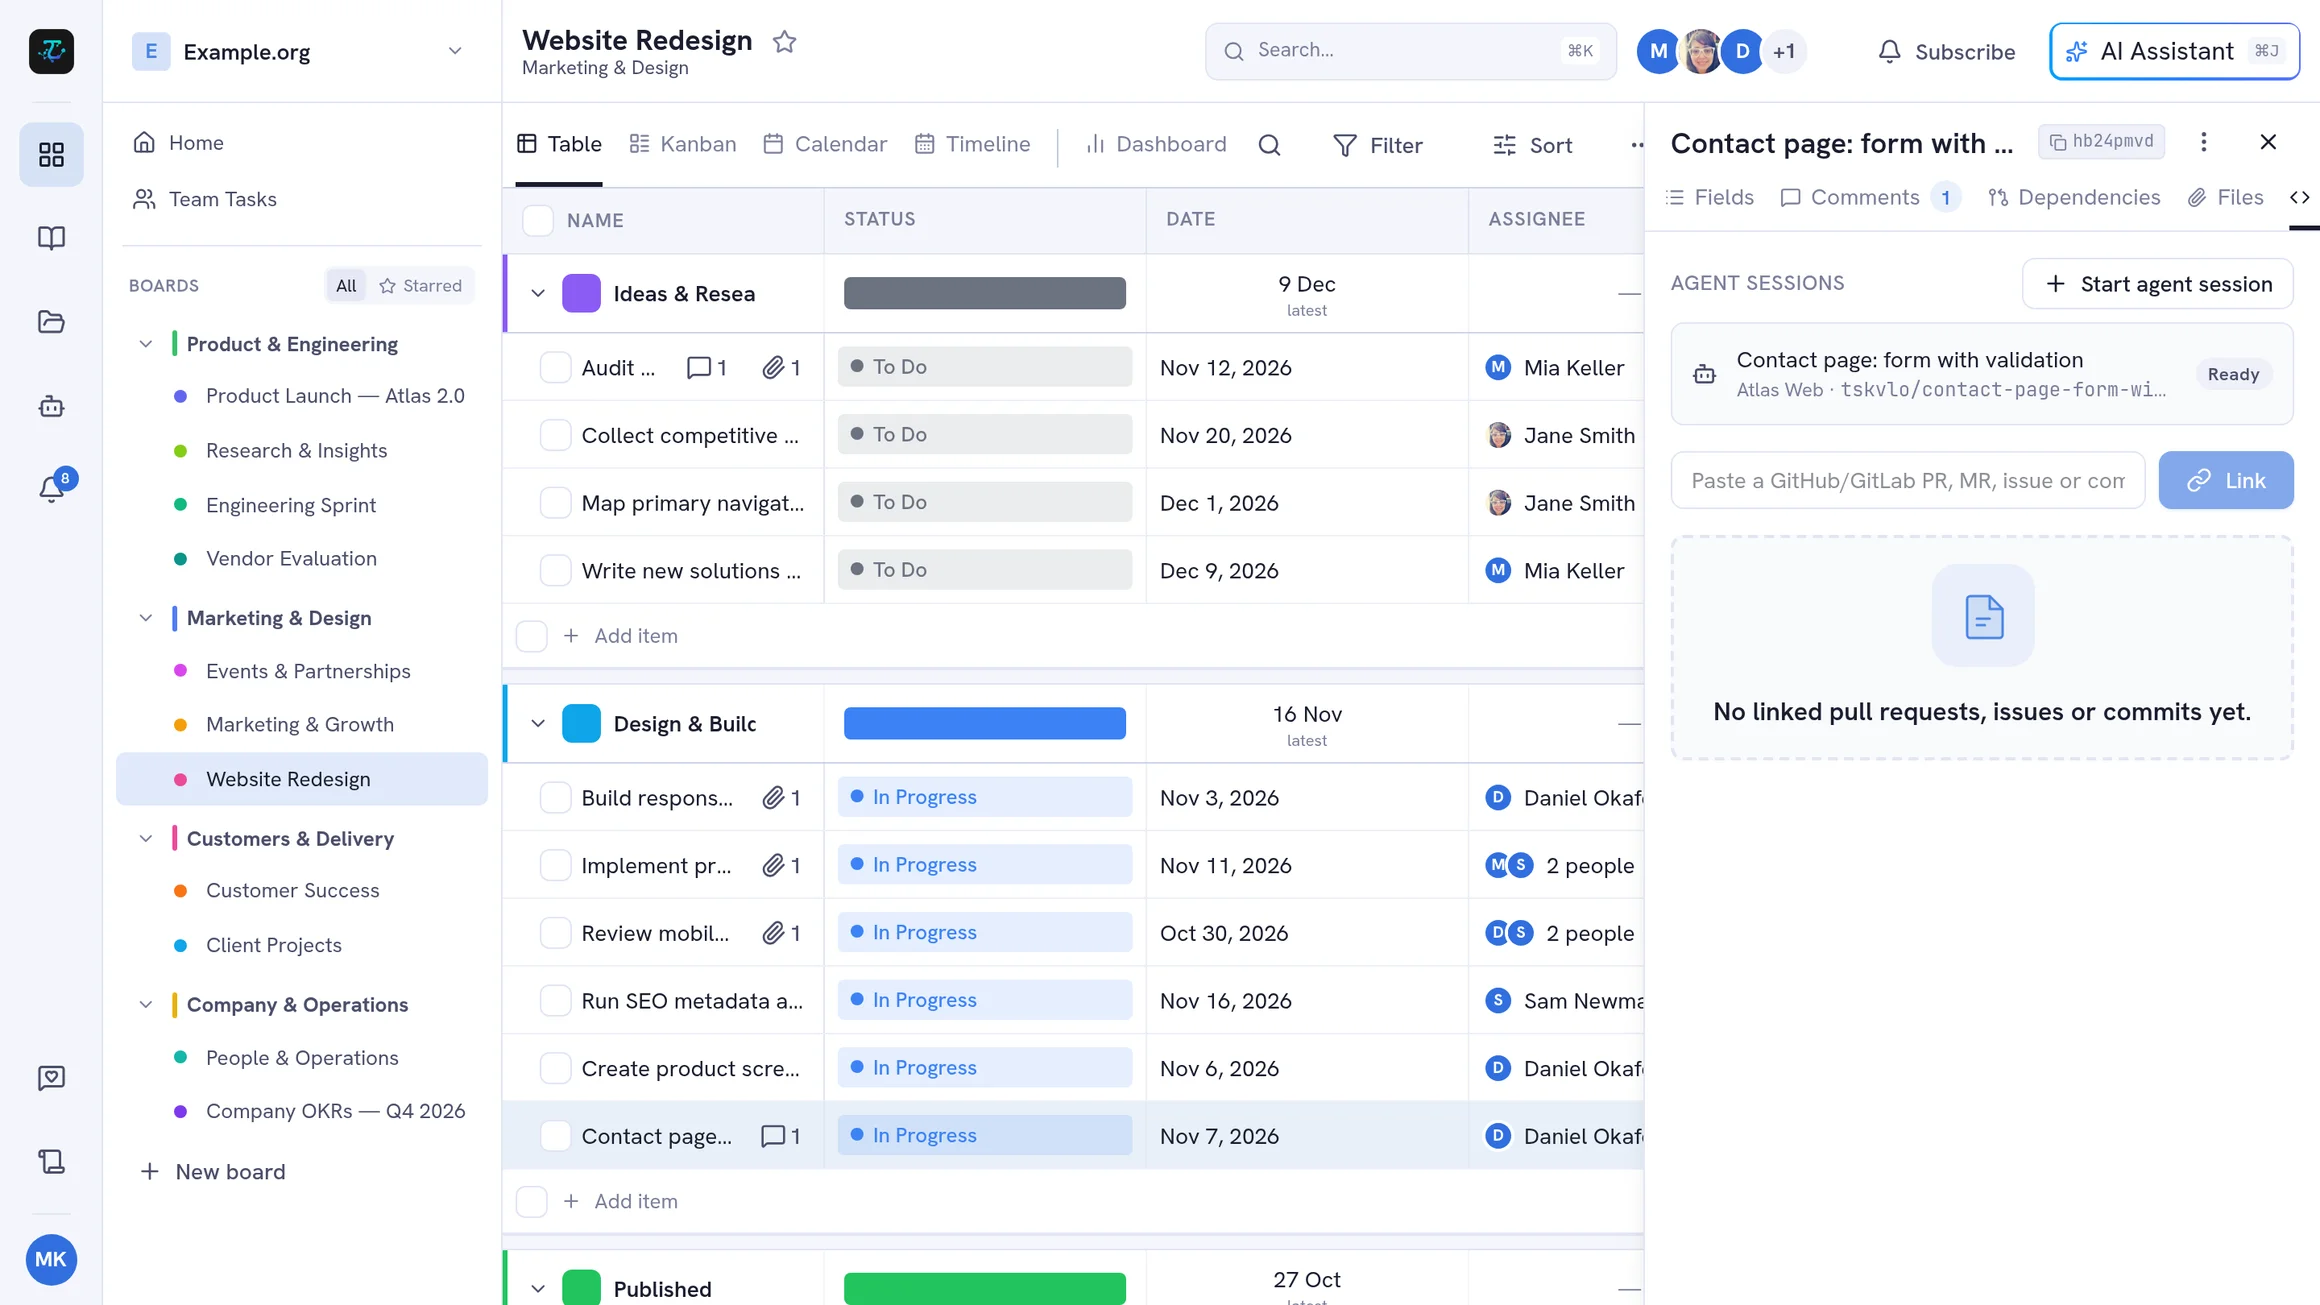
In a task’s Code tab, click Start agent session: pick a project and model, and the task’s title, description and comments are sent as the first message. Commits that are pushed or merged are linked back to the task when the workspace has a GitHub or GitLab connection for the repository.
Tools, Processes and Test Services
- MCP servers: in Workspace settings → AI / LLM configuration, an admin can offer an MCP server to agents (with headers or an OAuth sign-in); each project switches it on in its Settings tab, next to the built-in browser agents use to open pages and take screenshots
- Processes: agents start applications with pm2 — Agents → Processes shows them with their logs, and you can stop or remove them
- Run configuration and live preview: a project declares the processes of its app in
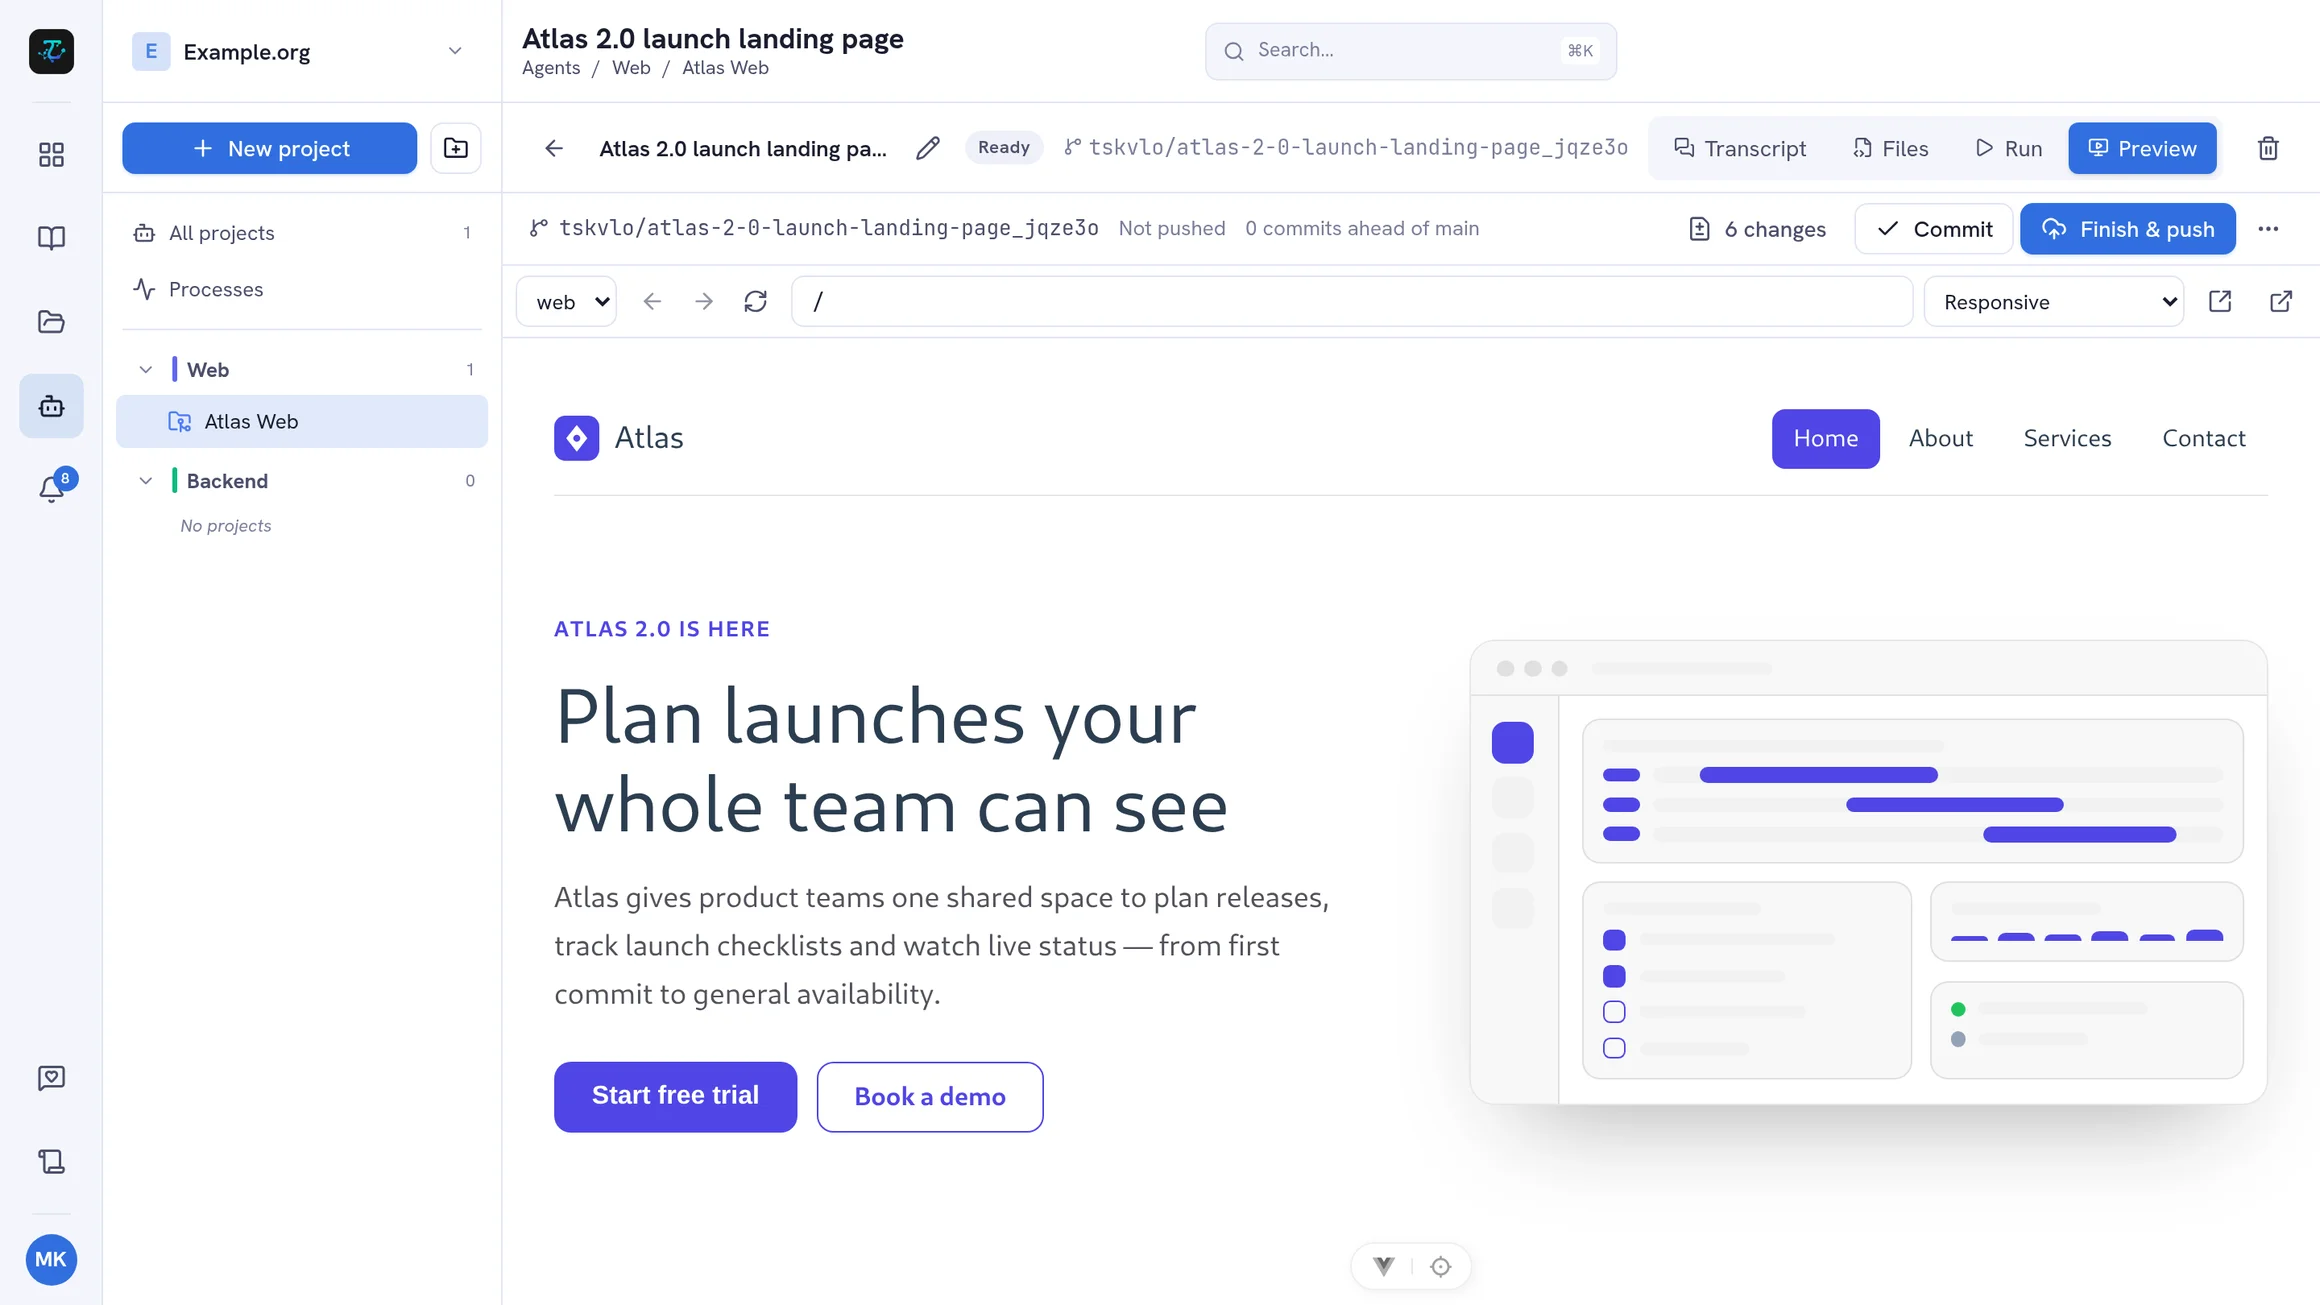
.tskvlo/run.json(command, setup, port, environment) — edit it in the project’s Run tab, where you also set secrets, which stay out of the repository. In a session’s Run view you start, stop and restart them per session with live logs, and Preview shows the running app in its own private address, scaled to phone, tablet or desktop sizes, next to the chat or in a separate tab. Agents use the very same processes - Test services: on the same page, an admin adds PostgreSQL, MariaDB, Redis or S3 for agents to test against. They are shared by all workspaces, but each workspace gets its own account that cannot see the others’ data; agents are told the credentials automatically and may create more databases and buckets. The page lists them with their size, and you can delete databases and buckets or clear the Redis keys
You get a notification when a session finishes or fails a turn, and when a loop waits for approval, is blocked, has failed or is done.